Create a Web-optimized GIF image from an icon
In relation to Axialis IconWorkshop, this article offers information on the following topics:
- Create a GIF file with Web optimization from an existing icon
- Create a GIF file using Axialis Image Object Packs
CompuServe GIF image format is widely used in Web pages because the majority of Web browsers recognize it. However this format has some limitations and images need to be optimized to meet Web requirements like size, colors and transparency:
- GIF Images don't support partial transparency (alpha channel). It means that either a pixel is transparent, either it isn't.
- GIF Images cannot contain more than 256 colors
- GIF Images support reduced palettes. Limited number of colors will result in smaller file but will produce lower image quality.
Axialis IconWorkshop permits you to save an icon image to GIF file formats preserving the transparency areas of the icon. Only one image will be extracted from the icon. We recommend you to extract the 256 color image from the icon if available.
Create a GIF file with Web optimization from an existing icon
1. Open your original icon file (from the librarian or using File/Open...).
2. The image file opens in a document window. In the image format list, select the image you wish to use to create the GIF file. We recommend you to extract the 256 color image from the icon if available, otherwise use RGB/A.
3. Choose File/Export/CompuServe GIF (Optimized for the Web) or press Ctrl+Shift+G.
4. A dialog box CompuServe GIF Optimizer opens:
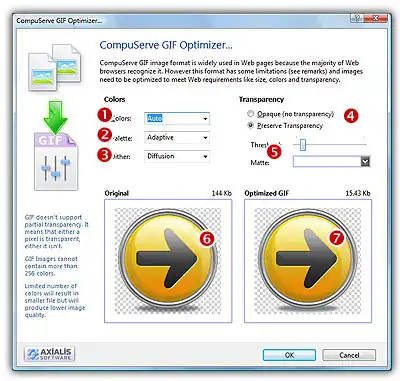
5. In Colors 1, specify the number of colors you wish to use in the image palette. Limited number of colors will result in smaller file but will produce lower image quality. Choose "Auto" if you're not sure about desired the number of colors.
6. In Palette 2, choose the type of palette desired:
• Adaptive - The palette will be calculated to get the best results possible (recommended).
• Web Safe - This is the default Netscape Web palette.
• Windows - This is the default palette used under old Windows versions in 256 color screen mode.
• Macintish OS - This is the default palette used under old Macintosh OS versions in 256 color screen mode.
7. In Dither 3, choose "Diffusion" if you want IconWorkshop to simulate colors not present in the palette by pixel mixing using the "error diffusion" method. Choose "None" to encode the image without dithering. Diffusion produces the best results but usually creates slightly larger images.
8. In Transparency 4, specify if you want to preserve transparency or not. Of you choose opaque, the transparent areas of the icon will be converted to solid color (the "Matte" color). If you choose to preserve transparency and encodes your GIF file from a RGB/A images, you may need to adjust the "Threshold" value 5 to produce better results on image edges.
9. In Preview, compare the original 6 and the optimized 7 images (image quality and size) to find the best adjustments possible.
10. When done, click OK. A standard Save Image As dialog box opens. In the Save as Type list select the desired image file format.
11. Choose a destination folder and type a new filename. When done, click OK. The file has been created on the disk.


Create a GIF file using Axialis Image Object Packs
Another fast and easy way to create your own original web images is to use Axialis Image Object Packs. Using these packs is free as long as you own a registered version of IconWorkshop. Image Packs permit to create your own icons from a library of basic images that you can easily assemble together using Drag & Drop. To read more about Image Objects, read this topic: "What is an Image Object?".
To follow this tutorial you need the following items:
- Axialis IconWorkshop 6.01 or more (Download 30-Day Tryout version)
- Axialis "Realistic Buttons" Object Pack (Download Tryout Pack)
Images in Object Packs have an original resolution of 256x256 RGB/A. So you can create images up to 256x256 pixels without quality loss. If the image you want to create is smaller, IconWorkshop will automatically resize the Image Objects you'll add. In this tutorial we'll create a 128x128 image to illustrate a "404 error - Page not found" :
![]()
1. Launch IconWorkshop. Choose File/New/Windows Icon Project or press Ctrl+W. A dialog box opens:
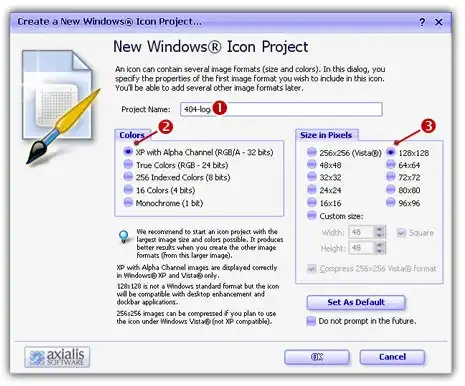
2. Type the name of the project 1: "404-logo".
3. Now specify the format of the first image to add in the project: In Colors, choose "XP with Alpha Channel (RGB/A 32 bits)" 2. In Size in Pixels, choose and "128x128" 3.
4. When done, click OK. A new icon project window is created 1:
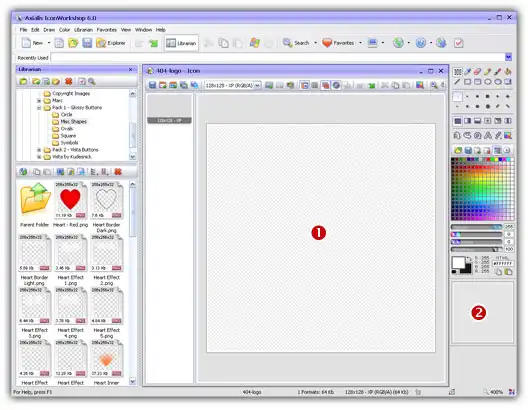
5. If the scale-1:1 preview window is not in 128x128 mode 2, we recommend that you switch to this mode. To switch to 128x128, right-click inside the preview window and a menu will open. Choose "128x128 Display".
The time has come to be creative which you'll find easy and a lot of fun with IconWorkshop. Before we start, don't forget that each step of the creation can be undone/redone up to 16 steps (Ctrl+Z/Ctrl+Y).
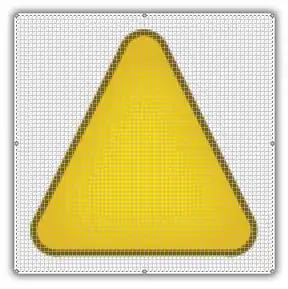
6. In the Librarian window (choose View/Librarian if it is not visible), select the "Objects/Pack 1 - Glossy Buttons/Misc Shapes " folder 1. If the pack is not yet installed download and install it from this page. A list of available Object are displayed in the contents window below 2. Find the "Triangle - Yellow.png" file and select it 3.
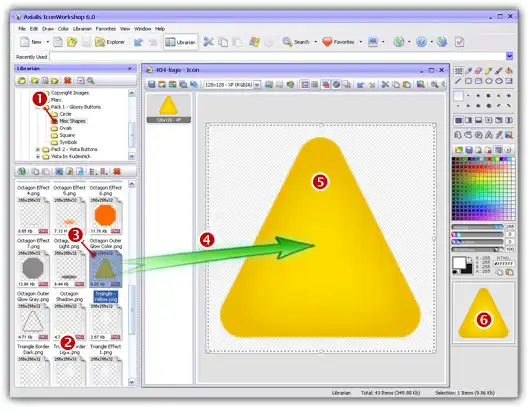
7. When done, use a mouse Drag-and-Drop to add it into the project as shown above 4. The Object is added to the project as a floating selection 5. Take a look at the quality of the artwork in the Scale 1:1 window 6.
Congratulations, you've just added your first Image Object to your project! As you can see it's very intuitive. Now let's continue and add other objects to build the icon.
Important
To follow the next steps, the "Preserve Transparency" option must be set (press "T" or select Draw/Preserve Transparency). If this option is not set, the transparency will not be kept each time you add a new image object and the objects already added will be fully replaced.
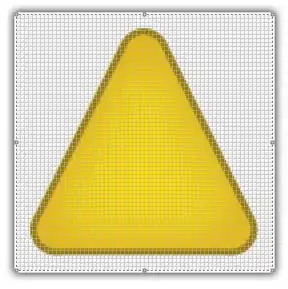
8. From the librarian, select the file "Triangle Border Dark.png" and add it to the project using the same method. The resulting image now includes a red light effect as shown below:
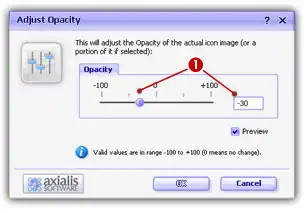
9. The border is too dark so we'll decrease the opacity. As a result, the border object will become "more transparent" and therfore less dark. Choose Draw/Adjustments-Effects/Opacity or press "O", a dialog box open. In the Opacity box, enter or adjust to -30 1:
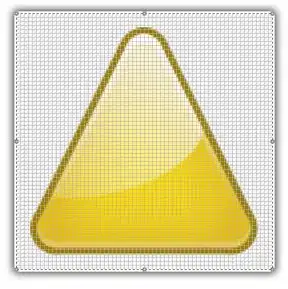
10. Click OK. Here is the result:
11. Don't forget the glossy touch! From the same folder, add the files "Triangle Effect 5.png", "Triangle Effect 6.png", and "Triangle Effect 4.png" to the project. Much better! It should look like this:
12. Now let's add the exclamation symbol. From the librarian, select the folder "Pack 1 - Glossy Buttons/Symbols" and add the file "Symbol Exclamation.png" to the project. The problem is that it is too large for a triangle background. So reduce it by approximately 10 percents using the rezise handles 1. Center it to the proper place using the mouse (use drag and drop by grabbing the center of the object then move it). The result should look like this:
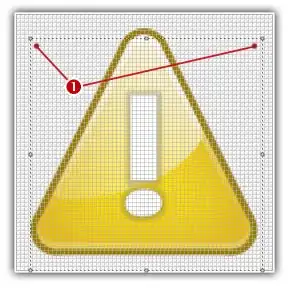
13. In our icon, the exclamation symbol is black. Choose Draw/Adjustments-Effects/Invert Colors or press "I"Here is the resulting image :

14. In our icon, the exclamation symbol is black. Choose Draw/Adjustments-Effects/Invert Colors or press "I"Here is the resulting image :
15. Now for the final touch: the shadow. We will add a shadow at the bottom and under the earth which will produce an interesting effect as if the globe was laid on a white horizontal plan.
First, we need to move the whole Earth 5 pixels up to leave more space for the shadow at the bottom of the image. Important: To do so, we must select the whole image. At present only the last object we've added is selected. Choose Edit/Select All or press Ctrl+A. There is no visual change but now you're ready to move the whole image.
To move the image, you can use the mouse (with a drag-and-drop) or use the arrow keys of the keyboard. To move the image 5 pixels up, hit the UpArrow 5 times. The resulting selection rectangle is now 5 pixels outside the top of the editor area.
16. We can now add the shadow. In the Librarian, select the "Objects/Pack 1 - Glossy Buttons/Misc Shapes " folder. Select the object "Triangle Shadow.png" in the librarian and add it to the project. The resulting image looks like this:
16. There's an obvious problem: The shadow is in front of the Triangle object! The solution is as easy as a keystroke: Press the End key or choose Draw/Set Floating Selection to Background.
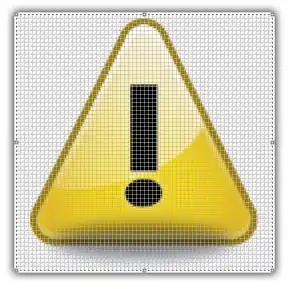
You're done! The resulting image should look like this:

17. Now let's save our icon as a Web-optimized GIF file. Choose File/Export/CompuServe GIF (Optimized for the Web) or press Ctrl+Shift+G.
18. A dialog box CompuServe GIF Optimizer opens:
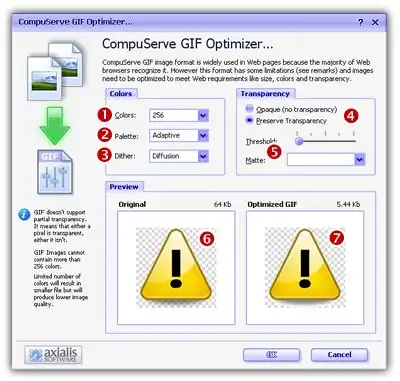
19. In Colors 1, specify the number of colors you wish to use in the image palette. Limited number of colors will result in smaller file but will produce lower image quality. Choose "Auto" if you're not sure about desired the number of colors.
20. In Palette 2, choose the type of palette desired:
• Adaptive - The palette will be calculated to get the best results possible (recommended).
• Web Safe - This is the default Netscape Web palette.
• Windows - This is the default palette used under old Windows versions in 256 color screen mode.
• Macintosh OS - This is the default palette used under old Macintosh OS versions in 256 color screen mode.
21. In Dither 3, choose "Diffusion" if you want IconWorkshop to simulate colors not present in the palette by pixel mixing using the "error diffusion" method. Choose "None" to encode the image without dithering. Diffusion produces the best results but usually creates slightly larger images.
22. In Transparency 4, specify if you want to preserve transparency or not. Of you choose opaque, the transparent areas of the icon will be converted to solid color (the "Matte" color). We recommend to set the matte color to white for getting the best results on Web pages. Also, set the "Threshold" value 5 to 0 or 1 if you want to create a transparent background and keep the shadow effect.
23. In Preview, compare the original 6 and the optimized 7 images (image quality and size) to find the best adjustments possible.
24. When done, click OK. A standard Save Image As dialog box opens. In the Save as Type list select the desired image file format.
25. Choose a destination folder and type a new filename. When done, click OK. The file has been created on the disk.