Create Windows XP Icons
In relation to Axialis IconWorkshop, this article offers information on the following topics:
- Introduction
- What about the Windows XP icon format?
- Windows XP Icon Style Characteristics
- Windows XP Icon Color Depth and Size
- Color Palette used in Windows XP Icons
- Perspective and Grouping Objects in Icons
- Drop Shadow
- Outlines
- Transferring an Image to IconWorkshop to Create an Icon
Learn how to create icons which deal with the new Windows XP Style. We'll also see which image formats must be included in such icons in order to be compatible with all screen configurations (see What is an Icon for more info).
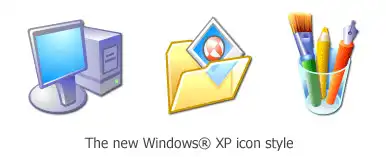
Microsoft Windows XP introduces a new style in icon design (see image below). We recommend you to follow the guidelines described in this topic to create compliant icons.
The best way to proceed is to start creating large scale versions of your images in an external vector or bitmap drawing program, such as Macromedia Freehand, Adobe Photoshop or Jasc Paint Shop Pro. The next step will be to import them into IconWorkshop to create your icons.
All these programs support the new Alpha Channel (a.k.a. 32 BPP Smooth Transparency) feature in images. This will help you to create beautiful icons with smooth edges.
What about the Windows XP icon format?
This is not a new icon format at all. This is a new image format that you can find in new generation of icons. This new image format is called "Windows XP format" in IconWorkshop.
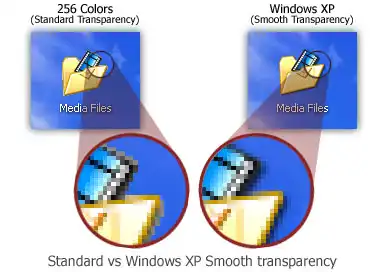
This image format contains a 24 bit image, providing 16,8 million colors to the image, plus an additional 8 bit image called the opacity image (a.k.a. Alpha Channel). As a result, the image color depth is 32 bits (i.e. you need 32 bits to define one pixel). The main advantage of this image format is that it permits to display a smooth transparency in icons. The resulting image is displayed with smooth contours on all backgrounds. It permits also to create dropped shadows behind icons. This interesting effect, which is recommended by Microsoft, is usually used in Windows XP icons.
The following illustration shows the difference between a standard image format transparency (in 256 color formats for example) and the new Windows XP smooth transparency:


Windows XP Icon Style Characteristics
To create a Windows XP compliant icon, try to respect the following characteristics:
1. Color is rich and complementary to the Windows XP look.
2. Angle and perspective provide a dynamic energy to the images.
3. Edges and corners of elements are soft and slightly rounded.
4. Light source is coming from the upper left-hand corner with additional ambient light illuminating other parts of the icon.
5. The use of gradients provides dimension and gives the icon a richer look.
6. A drop shadow provides contrast and dimension.
7. Outlines provide definition.
8. Everyday objects, such as computers and devices, have a more modern consumer look.
Windows XP Icon Color Depth and Size
To be compatible with all display cases and screen configurations, you must consider creating icons containing various image formats based on the following rules:
Image Sizes
• 16x16: Displayed in taskbar, windows upper-left corner, detailed lists...
• 24x24: Displayed in Windows 2000, Windows XP menus (optional)
• 32x32: Displayed in desktop, lists...
• 48x48: Displayed in Windows XP explorer and system lists...
Image Colors
• Monochrome: Displayed by Windows if the screen is monochrome (rarely used, optional)
• 16 colors: Displayed by Windows if the screen is 16 or 256 colors (recommended)
• 256 colors: Displayed by WWindows if the screen is 16bits or True Colors (recommended)
• RGB/A : Displayed by Windows XP if screen is True Color or more (recommended)
If an image format is missing, Windows displays the nearest existing image. It works but the result is generally distorted. Formats greater than 48x48 are not supported by Windows XP, they are used by Windows Vista.
Color Palette used in Windows XP Icons
The following colors are generally used in Windows XP icons:
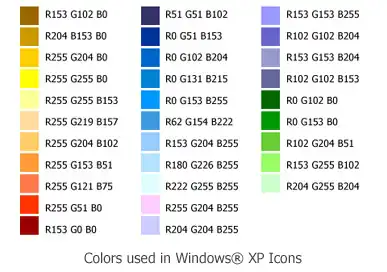
We have created a file containing these color swatches. The file "Windows XP.axco" is located in "Color Swatches" subfolder of the installation directory. For your information, this file format is compatible with ACO color files used by Adobe Photoshop.
Perspective and Grouping Objects in Icons
This is the perspective grid that Windows XP style icons use:
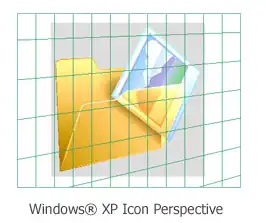
Not all objects work well at 16 × 16 at an angle. The following objects are usually shown in a straight-on manner:
• Document icons
• Icons that are symbols (such as warning or information icons)
• Icons that are single objects (such as the magnifying glass)
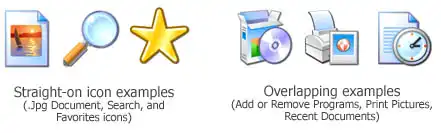
Create overlapping secondary objects at an angle unless it makes more sense, due to readability and integrity, that they are rendered straight on. Consider also how your icons may be viewed as a set to help determine how to group objects.
Windows XP icons use a drop shadow to provide definition and added dimension.
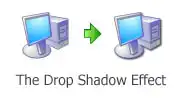
Adding a drop shadow effect is very simple using IconWorkshop. Once the object is created, choose Draw/Adjustments Effects/Drop Shadow. Don't forget to leave 2 or 3 free pixels in the right and bottom side of the object before applying the shadow.
When illustrating XP-style icons, add an outline to the image to provide definition and ensure that the image works well on different background colors.
Transferring an Image to IconWorkshop to Create an Icon
1. Axialis IconWorkshop supports the native Photoshop PSD image format with Layers and PNG with transparency. If you use Photoshop, save your image to a PSD file. If you use Paint Shop Pro, Freehand or Corel Draw, save it to PNG with transparency.
2. In IconWorkshop, choose "File/Open", browse your folders and select your file (Windows standard dialog box).
- or -
Choose "File/New/File Explorer" or press Ctrl+E. A built-in Axialis file explorer window opens. Browse your disks, see the thumbnail preview and double-click the image file you wish to open.
- or -
In the Recently Used zone (in the main toolbar), type the full pathname of the image file you wish to open then hit Enter.
3. The image file opens in a document window. If the image contains layers, you see them on the left side of the document window. You can select one layer by clicking on it. Its contents appears automatically in the main area. Now you can create an icon from this image (see Step 2 of topic Create an Icon from an Image File).