Create an Icon from an Image File
In relation to Axialis IconWorkshop, this article offers information on the following topics:
Learn how to create an icon from an existing image. This is the easiest way to create an icon. As icons contain transparency, we strongly recommend you to start from images with alpha-channel transparency. To read more about alpha-channels and icons, see this topic: "What is an icon?".
Open the image file in IconWorkshop
1. Choose "File/Open", browse your folders and select your file (Windows standard dialog box).
or
Choose "File/New/File Explorer" or press Ctrl+E. A built-in Axialis file explorer window opens. Browse your disks, see the thumbnail preview and double-click the image file you wish to open.
or
In the Recently Used zone (in the main toolbar), type the full pathname of the image file you wish to open then hit Enter.
2. The image file opens in a document window.
Note
Axialis IconWorkshop will convert images to 32 bpp with transparency when possible. This is much more convenient to create icons. The following image formats include transparency: Photoshop PSD, PNG, RGB, GIF, JPEG 2000 and WMF
Create an icon from this image
3. Before proceeding, we recommend you to select the portion of image you wish to use to create your icon. If you leave too many transparent areas around your image, the visible part of your icon will be too small.
4. Select the portion of image: Use the selection tool (upper-left button of the tool palette) and select the portion of image you wish to use (do not cut the shadow if there is one around the object). When done, an animated dashed rectangle has been created.
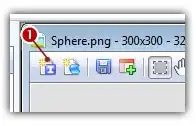
5. When the selection is done, choose Image/Create New Icon from Selection or press "I" or click the first command button in the local toolbar 1:

To create a Macintosh icon, the procedure is similar: Click the Apple button (just next to the Windows button) or press "M".
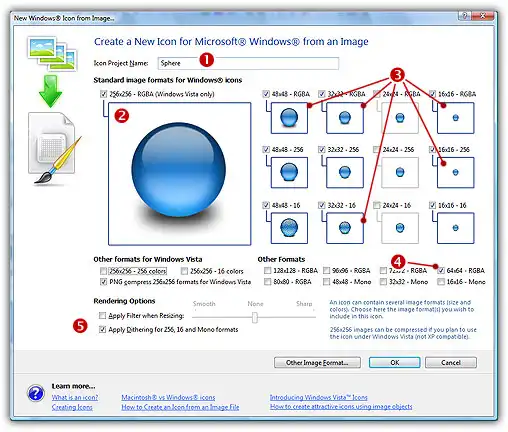
6. The dialog box New Icon From Image opens (see below). In the Name group 1, enter the icon project name. Do not specify any extension:

7. In the Image Formats group, select the image formats you whish to add in the icon (2 3 4) and unselect the unwanted images. Just click on the image preview to select/unselect. To know more about the desired Windows standard image format, see What is an Icon topic.
8. If you wish to start creating your icon with an unlisted format, click the Other Image Format button.
9. When done, click OK. The icon is automatically created with the various image formats you've selected. Save your icon. You're done!


