Make professional illustrations in bitmaps with object packs
When an image is opened for edition, you can work with it as you do with icons. One of the most powerful feature is the ability to assemble ready-to-use image objects to create professional icons or illustrations. To learn more about image objects, we recommend reading this topic: "What is an image object?".
Adding objects in an image
Remark: To follow the procedure below, you need the object pack #4 "Web 2.0 Icons". Only a limited trial version is provided in the Librarian. You can download the full version containing all the objects on our website (available to registered users of IconWorkshop): Download Image Object Pack #4 - Web 2.0 Icons
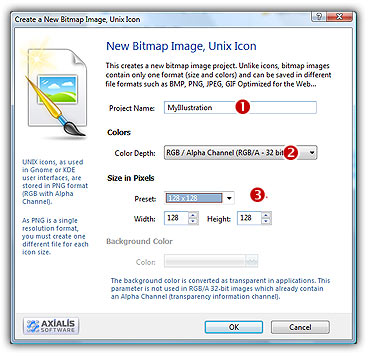
1. Choose File/New/Bitmap Image. The following dialog box opens:

2. Enter the project name: "MyIllustration" (![]() ). In Colors select RGB/A 32 Bits. This color depth is the best for creating nice illustrations from object packs. In Size in Pixels, select 128x128 which is the size of the image we want to create. When done click OK, the new image document is created.
). In Colors select RGB/A 32 Bits. This color depth is the best for creating nice illustrations from object packs. In Size in Pixels, select 128x128 which is the size of the image we want to create. When done click OK, the new image document is created.
3. Before going further, you must be sure that the librarian is visible. If the librarian window is not visible, check the Librarian button in the main toolbar or press ESC. Select the folder "Objects/Pack 3 - Web 2.0 Icons/Shapes/Circle" in the librarian tree (![]() ), the objects included in the folder appear in the list below:
), the objects included in the folder appear in the list below:
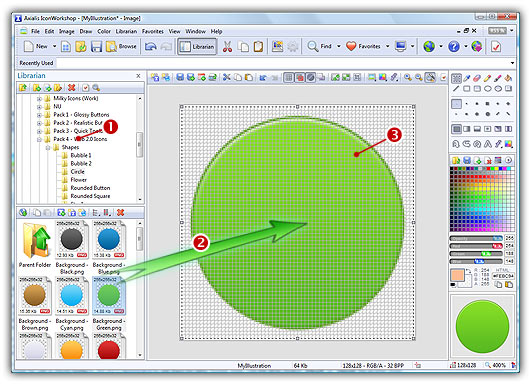
Using drag & drop, add the file "Background Green.png" to the image project (![]() ). The image object is now added as a floating selection in the editor (
). The image object is now added as a floating selection in the editor (![]() ). Now repeat the same procedure for the following steps. Only the image object name and resulting image project will be shown.
). Now repeat the same procedure for the following steps. Only the image object name and resulting image project will be shown.
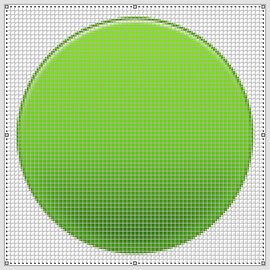
4. In the same folder, add the file "Inner Effect - Grey.png:
5. Select a square portion in the image editor from 8,8 to 119,119 (size 112x112). In folder "Symbols", add the file "Ok.png":

6. Choose Image/Adjustments Effects/Drop Shadow or press "D". A dialog box opens, enter the following values:
• Color: Black (RGB 0,0,0)
• Opacity: 50%
• Angle: -50 Degrees
• Distance: 0px
• Size: 8px
Click OK, an outer shadow has been added around the symbol as follows:

7. In folder "Shapes/Circle", add the file "Glossy 05.png. Choose Image/Adjustments Effects/Adjust Opacity or press "O". A dialog box opens, specify opacity -40:

8. To finish, let's add an outer shadow around the whole artwork. Click in the editor to remove the current selection. Choose Image/Adjustments Effects/Drop Shadow or press "D". A dialog box opens, enter the following values:
• Color: Black (RGB 0,0,0)
• Opacity: 80%
• Angle: -45 Degrees
• Distance: 0px
• Size: 10px
Click OK, an outer shadow has been added around the circle button:

9. Save your document File/Save (Ctrl+S). The standard Windows save dialog box opens. Select the file type you wish to use (read Which bitmap images are supported to learn more). If you want to create an image for the web (formats GIF or JPEG), read topic Save bitmap images for use in web sites to learn more.
For example, here is how the image is shown on a HTML page when saved as JPEG on a white background:
